The Table object is important in Constellab. It represents a 2D array, similar to a CSV file, and is used by many processes. This story will explain how to import a Table into your data lab from a file.
Let's import a simple iris.csv file into a Table to see how it can be done 💪
Upload a csv file
First, import the iris.csv file into your databox. You can have your lab directly download the iris.csv file from an external source. Open the databox and select (refer to How to upload a resource from an external source ? for more information). Then, paste the following link: https://gist.githubusercontent.com/netj/8836201/raw/6f9306ad21398ea43cba4f7d537619d0e07d5ae3/iris.csv
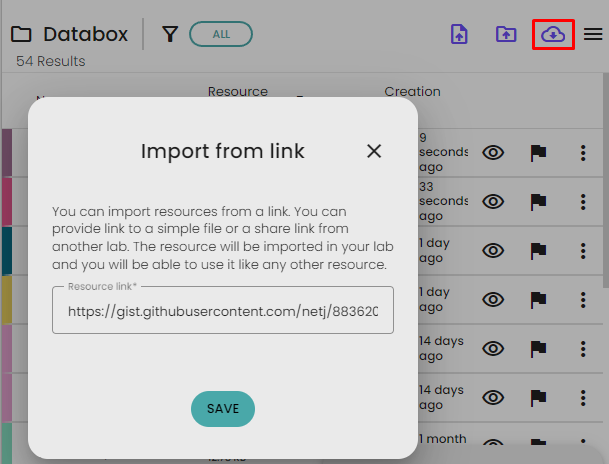
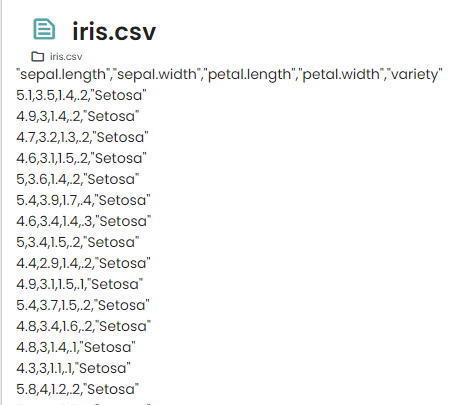
A new resource should be created and it should look like this:
Import the File to Table
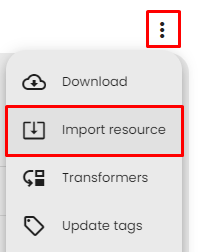
Now that your file is accessible in the lab, we need to import it to create a Table. For more information, you can refer to How to import a resource ? To begin, click on the menu button and choose Import Resource.
A popup window will appear, and the Table importer should already be selected.

Let's configure the Table Importer to correctly create our Table. Here are the important configurations:
- File format: csv. We specify the file format as csv (although the auto option could have been used).
- Delimiter: auto. It should automatically detect the comma delimiter.
- Header: 0. Since the first row contains the column names, we set the header option to 0.
- Format header names: checked. We check this option to remove any special characters, such as '.', from the header names. This is a good practice to ensure smooth column selection and avoid potential issues.
- Index column: -1. We leave this option as -1 because the csv file doesn't contain row names.
- Metadata columns: This option is important. It allows us to create tags from the
variety column for each row. The tag keys will be variety, and the values will depend on the column values (e.g., Setosa, Versicolor...). We also check the Keep in table option to retain the variety column in the table.
The configuration is now ready. Click on Import resource to proceed. A new Table resource should be created and look like this:
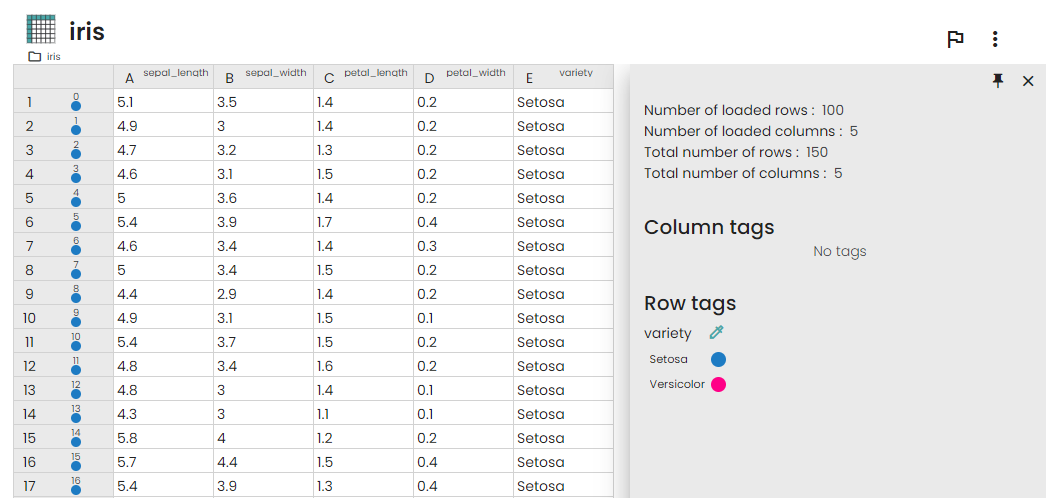
Please note that we have a total of 150 rows, which is as expected. The first column is called sepal_length, and the '.' was replaced with a '_'. Additionally, we have our row tags, and in this case, the first rows are tagged with variety: Setosa.
That's it! We can now use this Table in processes, create plots from it, or apply transformations as needed. See How to manipulate Table view to see what is possible with the Table.
