The Resources page
The Resources page is the central place to browse, manage, and upload data in your lab.
The page displays a table listing your resources with the following columns:
Click on a resource row to open its detail page. You can also click the Open resource icon to preview a resource in a dialog without leaving the list.
At the top right of the page, three buttons let you upload data:
- Upload files — Upload one or more files from your computer.
- Upload folder — Upload an entire folder.
- Upload from link — Download a resource from an external URL or a share link from another lab.
How to search and filter resources
The Resources page provides a search sidebar on the right side to help you find specific resources. You can filter resources using the following options:
- Name: Search by the resource name.
- Scenario: Filter resources generated by a specific scenario.
- Folders: Select a folder to show only the resources it contains. The folder panel is expanded by default.
- Tags: Filter resources by one or more tags. You can also click on a tag directly in the resource table to filter by that tag.
For more filtering options, expand the Advanced search panel. It includes:
- Resource type: Filter by the type of resource (e.g., Table, File, Folder).
- Origin: Filter by how the resource was created — Uploaded, Generated, Imported from lab, or Folder document.
- Generated by process: Filter by the type of process that generated the resource.
- Created by: Filter by the user who created the resource.
- Id: Search by the resource's unique identifier.
- Creation date: Filter by a date range.
- Include children resources: Show resources that are inside a ResourceSet.
- Include not flagged resources: Show resources that are not flagged.
- Include archived resources: Show archived resources.
The search panel also provides predefined saved searches at the top: Flagged resources (selected by default) shows only flagged resources, and All resources shows every resource in your lab.
How to upload a file?
 ▶
▶In a data lab, you have the capability to upload any file. Once a file is uploaded, this file is transformed into a Resource of type File that can be used within scenarios.
To upload a file, please follow these steps:
- Open the
Resources page in your lab environment.
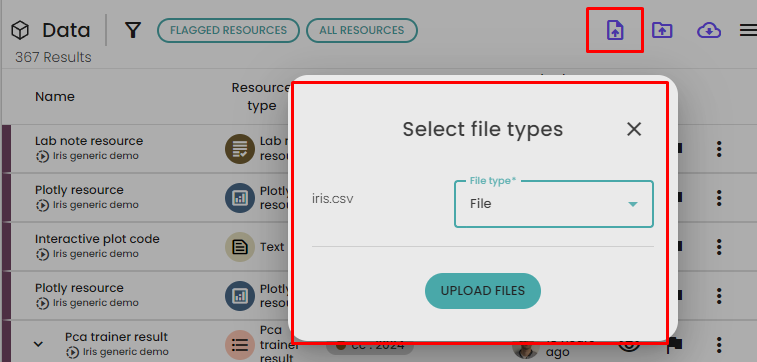
- Look for the
Upload files button and click on it.
- Select one or more files from your computer that you wish to upload.
- For each file, you may have the option to select the type of the file. In most cases, you can leave it as the default
File type. The File is a specific type of Resource that refers to a file. Setting a specific type can be helpful if you want to convert the uploaded file into a specific File type that is required in a scenario. You can change the type of file later.
- Click on the
Upload files button to start the upload process.
- You will see a progress indicator in a bottom right popup. While the upload is in progress, you can continue using the lab as usual.
- Once the upload is complete, the file should be available at the top of the list (you can also click on the success message in the popup to open the resource). You can check the size of the file to verify that the upload was successful.
Additionally, a Resource of type File can be imported and converted to another type of Resource , for example a Resource of type Table which is the main type of resource representing a table. To import a resource, please see the section How to import a resource ?
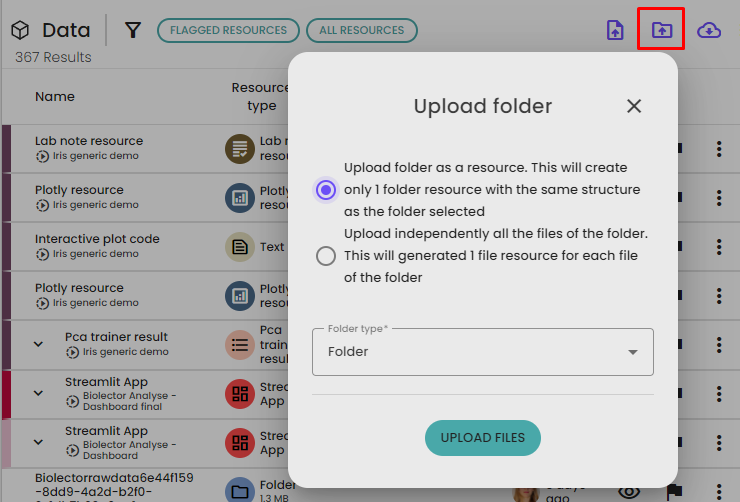
How to upload a folder?
 ▶
▶To upload a folder in the data lab, you have two options:
- Uploading each file of the folder individually: in this case, you will upload each file within the folder separately, treating them as individual resources. This method is similar to the file upload process.
- Uploading the folder as a
Folder resource: this option creates a single resource of type Folder. This can be useful when an process within a scenario requires a folder as an input.
To upload a folder follow these steps
- Open the
Resources page in your data lab.
- Look for the Upload folder button and click on it.
- Select the folder you want to upload from your computer.
- Choose whether you want to import the files individually or upload the whole folder as a single resource.
- Select the appropriate type of object for the folder or files.
- Click on the
Upload files button to initiate the upload process.
- You can monitor the progress of the upload in a similar manner as the file upload process.
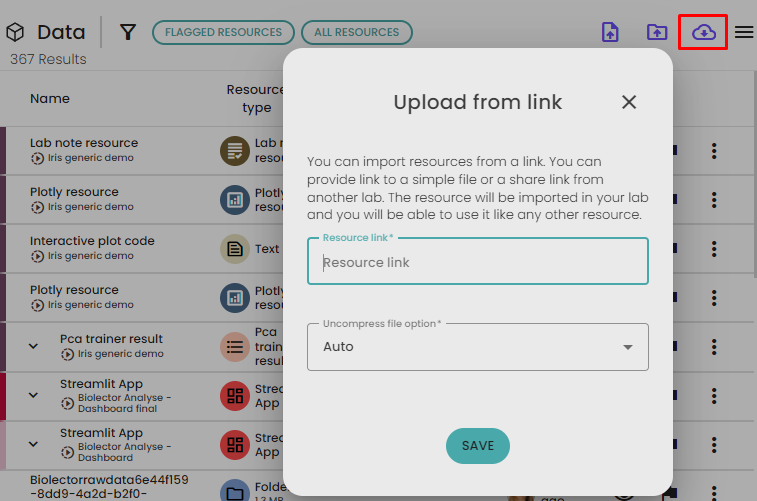
How to upload from an external link?
 ▶
▶From the Resources page you can also upload resources using an external link. This enables you to access files from a server and directly download them to your lab.
The link can be a public link to a file. It can also be a resource share link from another data lab, in this case the resource will be downloaded with the same type as the shared resource (see the section How to share a resource between labs ? for more information)
To upload a resource from an external link, follow these steps:
- Open the
Resources page in your data lab.
- Click on the Upload from link button.
- Paste the link of the file or resource you want to upload into the provided field. This can be a public URL to a file or a share link from another lab.
- Click on Ok to start the download.
- A scenario is created in the background to download the resource. You can check the progress in the running scenarios.
- Once the download is complete, the resource is available from the
Resources page.