How to use resource views
Each resource can be visualized using different views. A view is a specific way to display the resource's data. For example, a Table resource can be viewed as a spreadsheet or as a scatter plot. To manage views, use the Views button in the resource detail header.
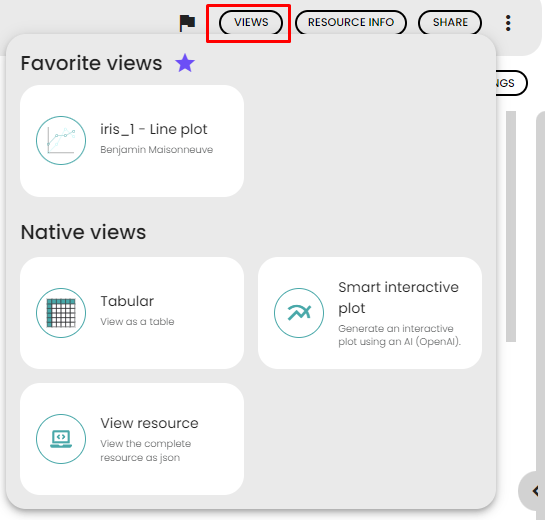
When you click on Views, a panel opens with two sections:
- Favorite views: Views you have previously saved as favorites. Click on a favorite view to load it immediately.
- Native views: All available view types for the resource. Click on a native view to open a configuration panel where you can set its parameters before generating it.
Once a view is displayed, you can:
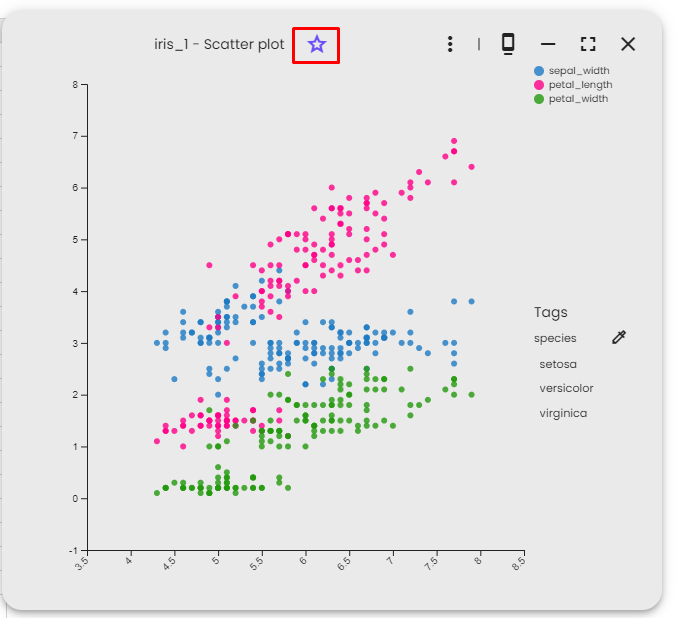
- Edit the view title: Click on the view title to rename it.
- Mark as favorite: Click the star icon to save the view as a favorite for quick access later.
- Undock the view: Click the Undock view button to open the view in a floating window that you can resize and move. Use the Dock view button to return it to the main page.
- View technical info: Click the Technical info button to display technical details about the view.
- Fullscreen: Click the Fullscreen button in the floating window to expand it to fill the entire screen. Click again to return to normal size.
How to generate a view?
When you open a resource, you will see the default view, but if you wish to explore your data differently, you can generate new views. The available views will depend on the type of resource you are working with. To create a new view, follow these steps:
- Open the resource page.
- Click on the Views button.
- You will be presented with two lists:
- Favorite views: Views previously generated and marked as favorites.
- Native views: All available views for the resource. Some may require configuration.
- Click on the view you want to use. If it needs configuration, fill out the required form and click Ok.
- The view appears in a floating window, showing the data in the selected visualization.
All generated views are saved, and you can access them in the History of views section within the Resource info dialog (see Managing resources). You can also find generated views in the Views gallery page.
How to mark views as favorite?
Views can be marked as favorites, which is a handy way to save the configuration of a view and make it easily accessible. Once a view is marked as a favorite, it appears in the Favorite views section of the Views panel.
To mark a view as a favorite, follow these steps:
- Open the view you want to mark as a favorite.
- Click on the star icon next to the view title.
To remove a view from your favorites, click the star icon again.
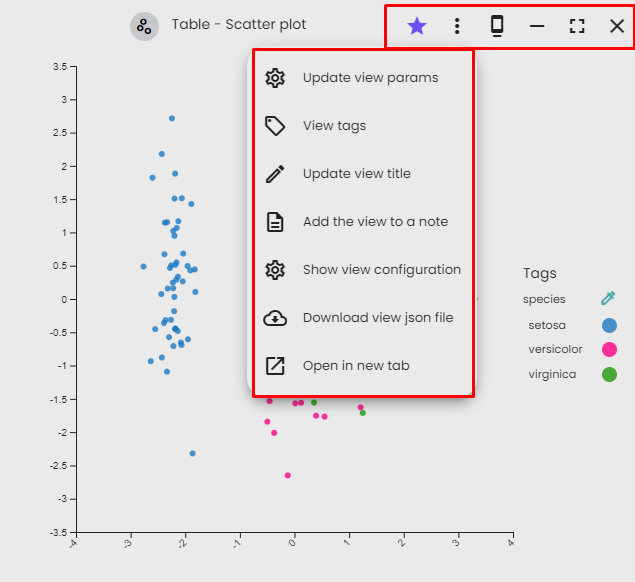
View actions
Once a view is displayed, you can perform several actions from the view header and the settings menu.
- Click on the view title to edit it directly. This allows you to give the view a more descriptive name.
- Click on the star icon to mark or unmark the view as a favorite.
- Click on the View settings menu (three-dot icon) to access the following options:
- Tags: Manage the tags associated with the view, which helps organize and find views.
- Update view title: Change the title of the view.
- Add the view to a note: Insert the view at the end of a note of your choice.
- Show view configuration: Display technical information about the view configuration.
- Download view json file: Export the view as a JSON file. This is useful for sharing views with the community.
- Open in new tab: Open the view in a new browser tab. This is useful for sharing the view link.
- In the floating window, additional buttons are available:
- Dock view: Close the floating window and set the view as the main view on the page.
- Fullscreen: Expand the floating window to fill the entire screen. Click again to return to normal size.
- Close: Close the floating window.