Constellab data labs are also available for you on your computer.
You can run the entire lab environment (including codelab) in any Windows, Mac or Linux machine.
Requirements
You need the Docker technology installed in you computer. This allows you to run the different required services (lab, codelab, databases, interface, etc.). You can install it here: https://www.docker.com/.
Here are the minimum recommended specifications for your computer to run the lab properly:
Windows
For windows, windows 10 or higher is required.
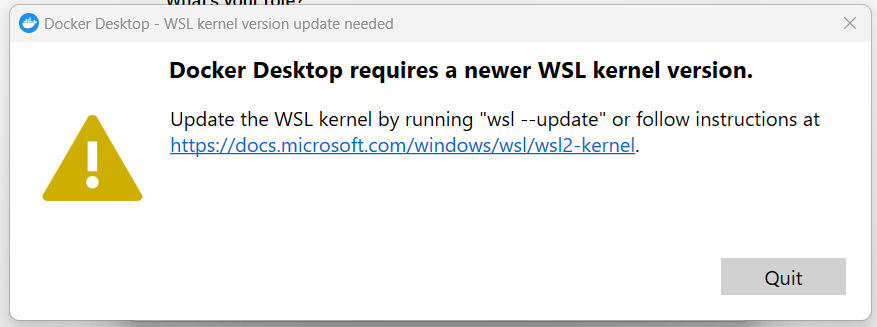
On windows, the first time you launch Docker Desktop there might be a warning about WSL that is not up to date. Please follow the instruction to update WSL. .

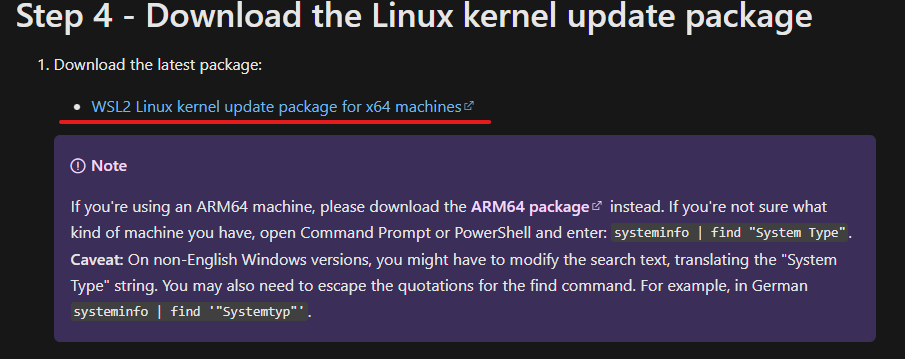
Follow the link and install the WSL kernel. Once its install, restart docker and the warning should have disappeared.

https://learn.microsoft.com/fr-fr/windows/wsl/install-manual#step-4---download-the-linux-kernel-update-package
Create your desktop data lab
To create your own data lab, log in your Constellab account, select the space where you want to connect your new lab.
Click on Add a new data lab from the Dashboard or from the page Data labs and then select Desktop.

Provide a name to your data lab, select the platform of your computer and click Save.

This will open the data lab detail page.
Add folder (optional)
You can add the folders you want in your the data lab, this will be useful if you want to upload scenario, notes or resources to your Space. If you haven't folder so far, you will be able to connect your folder later, don't worry.

Start the data lab
Before starting the data lab, make sure that Docker Desktop is running (you can execute the Docker Desktop app).
Copy the command displayed in your desktop data lab page and run it on your computer.

This command should start a docker containers lab-manager and lab-manager-standalone. Wait a few seconds and open the url http://localhost:82 (port of lab-manager-standalone container). It opens the desktop lab manager interface :

This interface will allow you to configure, start and stop you desktop data lab. First you need to configure the lab manager.
To do so, open you desktop data lab detail page in Constellab and click on Generate configuration.

This will download a json file on your computer. Go back to the lab manager interface and click on Configure lab manager.

Select the json configuration file that you've just downloaded.
From now, the configuration is similar to on cloud data lab. New sections appear in the lab manager:

First, add bricks to you data lab, the gws_core brick is mandatory.
Once you bricks are configured, click on Start to start your desktop data lab. After few minutes, the desktop data lab will be available.

Open data lab
Once the data lab is ready the Go to lab button should be available, click on it to access you desktop data lab. You can also open the url : http://localhost:89.

You can log in with your Constellab account 🎉. You will need a network connection to login
Start you existing desktop data lab
- Check that docker is running (see section in Troubleshooting)
- There are 2 solutions to start all the apps of your data lab
- Recommended : Start the
lab-manager container. Open lab manager app and click on Start. - Open docker desktop click on the start button on the
lab app folder (see Find data lab app folder in docker desktop). this will start all the app for the data lab. Wait for the data lab to be ready and open you browser.
Restart your data lab
Open lab manager app and click on Restart lab.

This will restart all the apps of your data labs. Wait for your data lab to be ready and open click on Go to lab.
Stop your data lab
Open lab manager app and click on Stop.

Change brick version
This is the same as an on-cloud data lab, open the lab manager and update bricks in Data lab bricks section.

Update lab manager
If a new version of lab manager is available, a message will be displayed in lab manager section. Just click on the button and follow the instructions.

Configure lab manager
At any time you can re-upload the configuration file to the lab manager. In Lab manager section > Lab manager advanced config click on Configure lab manager.

Troubleshooting
Check that docker is running
The desktop data lab required docker on your computer, to check that docker is running you have 2 solutions.
- open docker desktop app (this will automatically start docker)
- open a command line and type
docker --version, check the output, an error should occured if docker is not started.
Find data lab app folder in docker desktop
Once your data lab was created you will find a new folder in docker desktop that contains all the app.
Open docker desktop. In Containers tab you should find a folder named lab-manager-dev.

In this folder, you will see all the app (named container) that runs for the data lab. You can check the status of the app (exited, running, error).
Here is the list of the apps and their role:
-
glab : this is the main app, this run all the python code, the data lab and the scenarios. -
codelab : this is the dev environment that include the online VsCode -
front : this is the web interface of the ldata ab -
gws_core_prod_db : database for the prod environment -
gws_core_dev_deb : database for the dev envirnonment -
test_gws_dev_db : database that is used when we run tests -
gws_biota_db : biota database
You can manage all app as once by clicking on the button at the folder level. You can also manage them independently (not recommended)
Delete desktop data lab's data
In Lab manager > Lab manager advanced config click on Delete services. This will delete the lab running apps.
The you can delete the lab manager containers : docker container rm -f lab_manager lab_manager_standalone
After deleting the apps, you can delete the data. Delete all the volumes that were creating during configuration. You can find the list of volume in you desktop data lab page : docker volume rm lab-manager-config

