In Constellab it is also possible to create virtual environments (using PipEnv, Conda or Mamba) and run command line in a virtual environment or not.
We created the ShellProxy class to help you manage this.
Shell proxy
ShellProxy class is available in gws_core brick and allows you to run command (without virtual environment).
To create the ShellProxy you can provide 2 parameters
-
working_dir : working directory for the shell (all command will be executed from this dir). If not provided, an new temp directory is created -
message_dispatcher : if provided, the output of the command will be redirected to the dispatcher. Can be useful to log command outputs in task's logs
After you can simply call the run method of the ShellProxy to execute commands. You can run multiple command on the same ShellProxy (all the command will be executed in the same working directory)
Here is an example of the use of ShellProxy in a Task to call sleep command.
def run(self, params: ConfigParams, inputs: TaskInputs) -> TaskOutputs:
        # Create the shell proxy. No need to provide the working directory.
        # Provide the task message_dispatcher so command outputs, will be log in the task
        shell_proxy = ShellProxy(message_dispatcher=self.message_dispatcher)
        # retrieve parameter
        waiting_time = params.get_value("waiting_time")
        # run the command
        shell_proxy.run(f"sleep {waiting_time}", shell_mode=True)
        # return the input resource as output
        resource = inputs["resource"]
        return {"resource": resource}
PipShellProxy, CondaShellProxy and MambaShellProxy
PipShellProxy , CondaShellProxy and MambaShellProxy classes allows you to run command or python script inside a virtual environment. The usage of thoses class is similar that ShellProxy but to create theenvironment shell proxy you will need to provide 2 information:
-
env_dir_name: unique name for the env directory. This name will be used to create the env directory. If the env directory already exists, it will be reused. -
env_file_path : path to the env file. This file must contained dependencies for the virtual env and will be used to create the env. If the env file has changed, the env will be recreated and previous env will be deleted.
When you run a command theses proxies, the system will automatically install the environment if it is necessary. You can run multiple commands with the same proxy (the commands will be run in the same virtual environment).
Pip env live task
This task will allow you to run a python script inside a pip virtual environment. This environment requires a PipFile, here is the documentation about it : https://pipenv-fork.readthedocs.io/en/latest/basics.html.
Conda and Mamba env live task
This environment requires an environment yaml file, here is the documentation about it : https://conda.io/projects/conda/en/latest/user-guide/tasks/manage-environments.html#create-env-file-manually.
Create the ShellProxy
The same virtual environment might be used by multiple tasks, so it can be useful to externalize the ShellProxy creation.
Here is an example of an Helper class to is used to create a CondaShellProxy for Qiime2.
class Qiime2ShellProxyHelper():
   # Unique name of the virtual env
    ENV_DIR_NAME = "Qiime2ShellProxy"
   # Path of the virtual env file relative to this python file
    ENV_FILE_PATH = os.path.join(os.path.abspath(os.path.dirname(__file__)),  "./env_files/qiime2-2022.8.3-py38-linux-conda.yml" )
    # method to create the shell  proxy
    @classmethod
    def create_proxy(cls, message_dispatcher: MessageDispatcher = None):
        return CondaShellProxy(cls.ENV_DIR_NAME, cls.ENV_FILE_PATH, message_dispatcher=message_dispatcher)
Now any code can create the virtual environment by calling Qiime2ShellProxyHelper.create_proxy() to create the configured ShellProxy.
Manage installed environments
The system takes care where to save the virtual environment. You can find the installed virtual environment in the folder /lab/.sys/.env or in the lab Monitoring page :
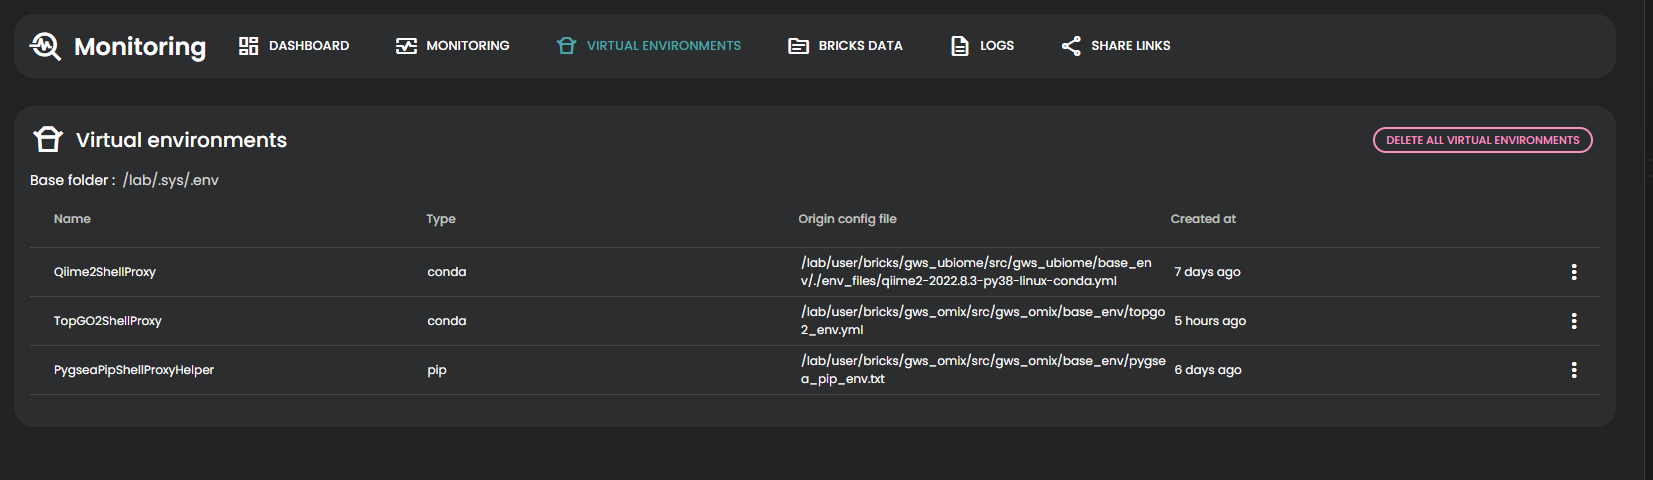
In this page, you can view all the existing virtual environment, their origin and creation date. You can have some detail information about the environment (size of the env, detail of the env file) and you can delete the environment.
